BigJ
FRF Addict
- Joined
- Aug 5, 2010
- Posts
- 5,448
- Reaction score
- 1,561
Been reading a lot lately about several folks discovering that their 3rd brake light is leaking. I've read that the results from that leak can range from no problems, to headliner staining, to hill decent control faults, ABS faults, to who knows what else. Bottom line? Ya really REALLY don't want that thing leaking.
Here's the SSM that deals with it
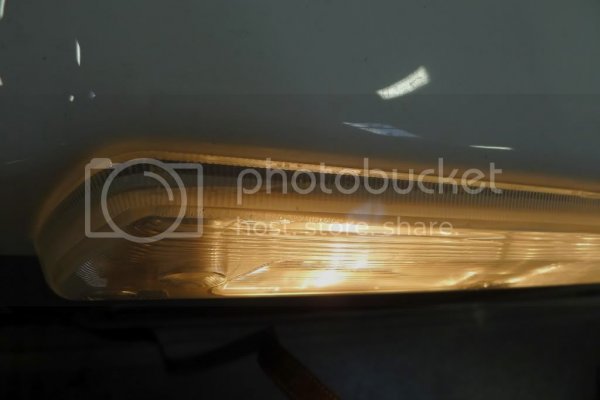
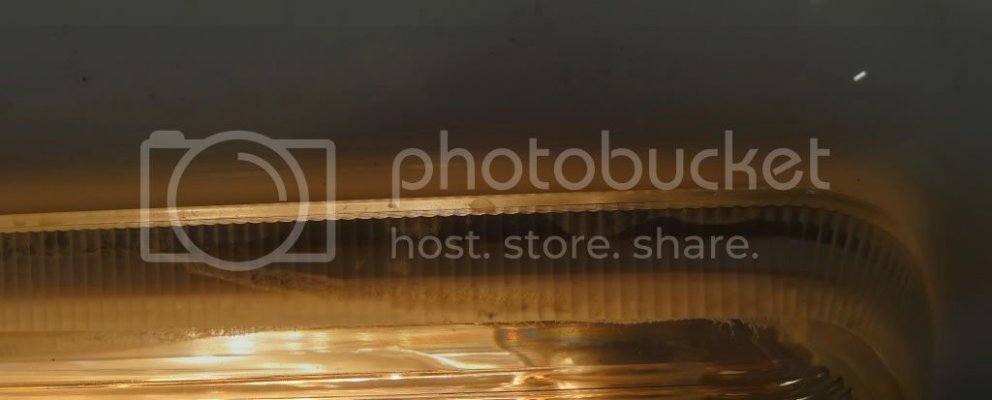
Here's what mine looks like before the fix. A little weird, but no water leakage that I can tell:
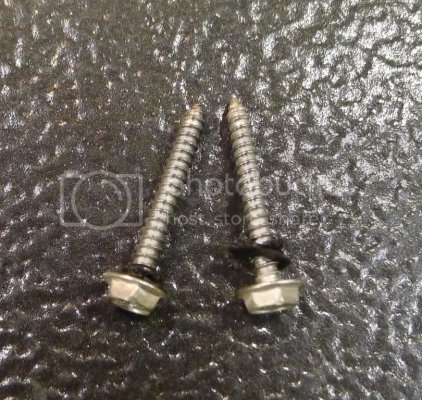
To pull it down, grab a #2 phillips screwdriver and slowly back out the two screws holding it in place
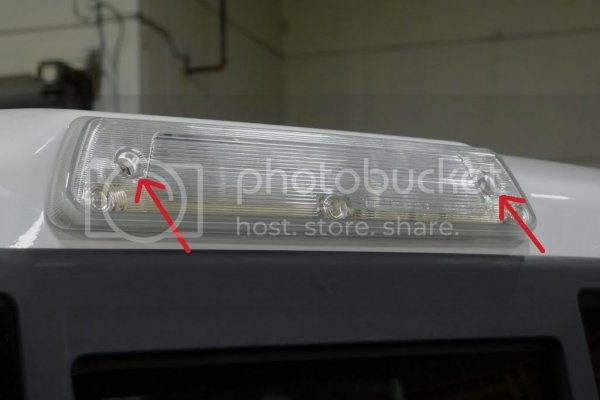
A quarter turn clockwise on each socket will free it from the housing, and a quick press to release the clip drops the LED connector. I didn't bother since its simple enough to apply the silicone with it up there, but if your housing is wet or dirty, ya might want to so its easier to dry out and clean up.
Clean the area and the gasket. I used some denatured alcohol on the paint, and just a dry rag on the gasket. Make sure all surfaces are bone dry before proceeding. If yours is wet, you can use a hair dryer to speed up the drying process.
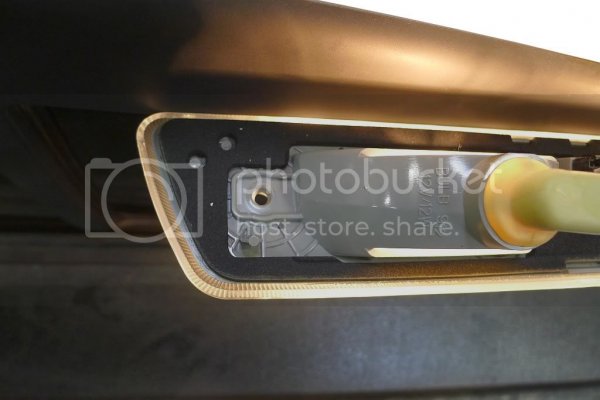
Now apply your silicone. I used GE Silicone II in white for demo purposes, but you'd probably want to go with black or clear. If you can't find the GE stuff, make sure you pick a silicone that stays flexible, is waterproof and wont dry out with UV exposure.

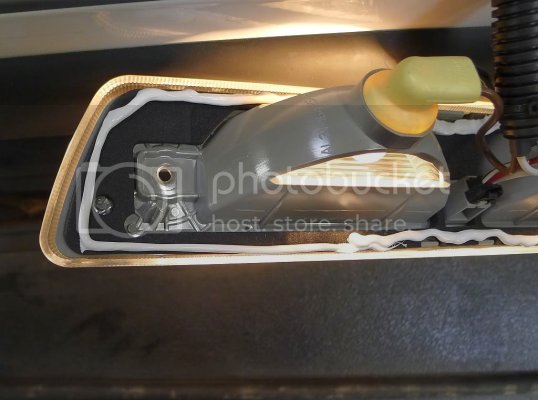
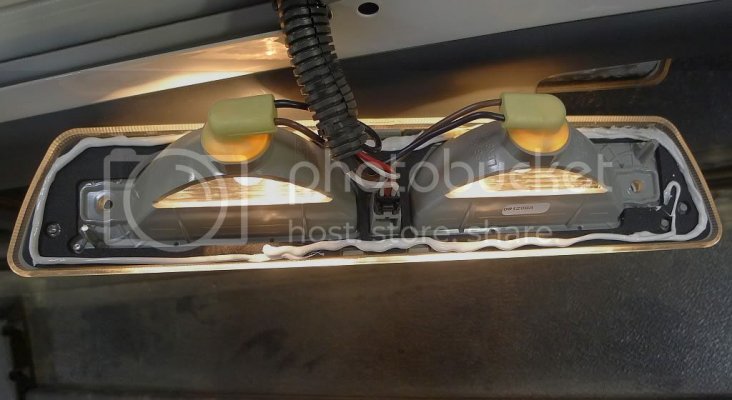
Carefully reattach the sockets to the housing (a quarter turn counter clockwise) and the LED connector by reclipping it in if you pulled the light all the way off, slide the light back in place and tighten down your screws. Don't tighten too much! You'll crack the plastic if you do. Also be careful not to cross thread your screws; a firm press before ******** in made sure mine were seated correctly.
I didn't use a dab of silicone on the screws, but you could if you wanted to be extra sure.
In theory, when a bulb blows this should pull off with the gentle help of a putty knife. I should then be able to clean up the old silicone, replace the bulb(s), reapply new and all should be well.
All told this took 10 minutes start to finish, including a few minutes of cleaning up the silicone that squeezed out the sides (I used a q-tip and ran it along the edges, wiping it off as I went). Time well spent given the serious headaches a leak up there can cause, and cost!
Here's the SSM that deals with it
I've never had a problem, but mine was built before the SSM's cutoff date, so I figured I'd better be safe that sorry since I'm out of warranty. At a minimum Ford wants somewhere around $400 to replace the light (before labor!) and who knows what else to diagnose any other problems the leak caused. So I pulled it down and lined the edge with a bead of window and door silicone. I didn't find a how-to really, so I figured I'd make one just 'cause.Hill Decent Control Fault. SSM 21317
Oasis special service message number: 21317
message title: 2010 svt raptor - hill decent control fault and dtc c116a
applicable vehicles :
2010 truck : 00029 f-series ld
oasis message :
Some 2010 f-150 svt raptor vehicles may exhibit hill decent control fault with
abs dtc c116a. On vehicles built before 2/26/2010 only, inspect the high mounted
stop lamp for evidence of water intrusion. Refer to wsm section 417-01 for
replacement details part number al3z-13200-a. Torque screws to 1.5 nm / 13
lb-in. No water intrusion follow wsm section 206-09, pin point test i. Note: It
is normal for the brake pressure (brakpres) pid to occasionally spike high due
to test pulse sent to the pressure sensor by the abs module. In addition, brake
pressure signals as low as -225 psi without brake apply should also be
considered normal. .
Applicable symptom codes :
200000 electrical
206000 electrical warning indicators
300000 chassis
301000 chassis service brake system
Here's what mine looks like before the fix. A little weird, but no water leakage that I can tell:


To pull it down, grab a #2 phillips screwdriver and slowly back out the two screws holding it in place


A quarter turn clockwise on each socket will free it from the housing, and a quick press to release the clip drops the LED connector. I didn't bother since its simple enough to apply the silicone with it up there, but if your housing is wet or dirty, ya might want to so its easier to dry out and clean up.
Clean the area and the gasket. I used some denatured alcohol on the paint, and just a dry rag on the gasket. Make sure all surfaces are bone dry before proceeding. If yours is wet, you can use a hair dryer to speed up the drying process.

Now apply your silicone. I used GE Silicone II in white for demo purposes, but you'd probably want to go with black or clear. If you can't find the GE stuff, make sure you pick a silicone that stays flexible, is waterproof and wont dry out with UV exposure.


Carefully reattach the sockets to the housing (a quarter turn counter clockwise) and the LED connector by reclipping it in if you pulled the light all the way off, slide the light back in place and tighten down your screws. Don't tighten too much! You'll crack the plastic if you do. Also be careful not to cross thread your screws; a firm press before ******** in made sure mine were seated correctly.
I didn't use a dab of silicone on the screws, but you could if you wanted to be extra sure.
In theory, when a bulb blows this should pull off with the gentle help of a putty knife. I should then be able to clean up the old silicone, replace the bulb(s), reapply new and all should be well.
All told this took 10 minutes start to finish, including a few minutes of cleaning up the silicone that squeezed out the sides (I used a q-tip and ran it along the edges, wiping it off as I went). Time well spent given the serious headaches a leak up there can cause, and cost!
Last edited:


